I've made some progress in the last couple of days. It doesn't really
seem like it, but, a lot of thought and some trial and error, and
progress has been made.
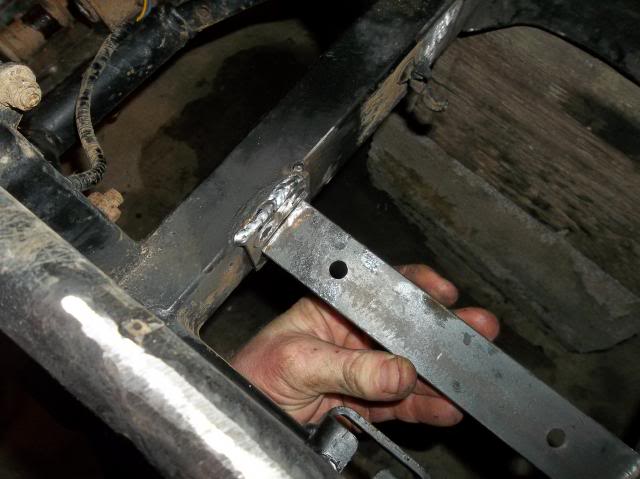
I pulled all the wiring and associated parts from the rhino. Installed
the correct length front driveshaft (still need to make carrier
bearing mount), figured out my rear brakes and made big progress on
mounting turbo.
Side Note: I bought a new Hobart 230amp welder from the farm store
several years ago. She was get'n tired and did not have the capability
to power a spool gun for aluminum, plus, that little twin cylinder
koler was the loudest engine I've ever had. So, sold the Hobart and
went out looking for a new machine. My son is graduating this spring
from high school and has become quite the welding pro. Plans are to
partner him into the business and let his welding skills open new
avenues for the stale winter time dirt business. So, I decide to go
all out and buy everything we need to weld anything, which includes a
new engine driven machine. I felt I was pretty versed in the world of
welding machines, man was I ever wrong. Now that we have a brand new
Miller 302 Trailblazer, I can say I'm not so ignorant to the welding
world. The Trailblazer is going back as soon as the new Miller 300 D
(Big Blue) ships in. For those looking and interested, Miller makes a
high speed diesel welder and a low speed diesel welder. Unfortunately,
the Trailblazer is a high speed diesel welder that cranks out at
around 3800RPM and makes just as much noise as the old Hobart. That
little kobota in there would live the rest of its life wide open. Now,
the 300D is a low speed welder cranking a whopping 1800rpm all the
time.
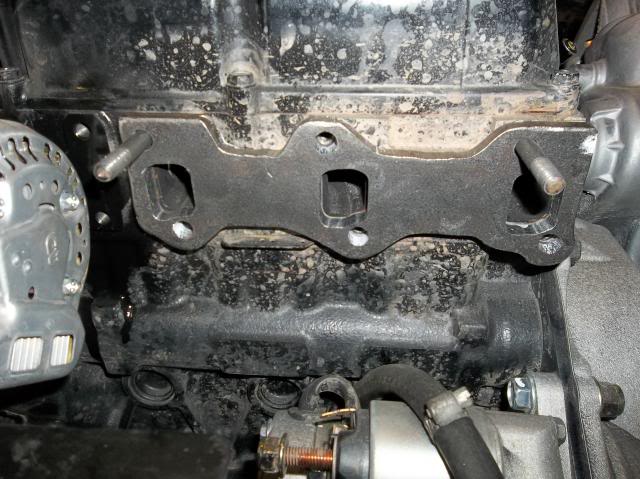
Anyhow, back to the Rhino. These are a couple shots of the header flange:

I was going to mount the turbo just behind the head making for a short
header, short pressure piping and quicker boost. I'm glad I didn't get
started on it until the turbo arrived. She is a little thing, but,
still not small enough to make mounting easy. It would have fit behind
the head, but, the exhaust would have exited just beside the driver
seat and even with heat wrap, I was afraid the heat soak would have
been unbearable for the driver. So, I decided to mount the thing just
under the driver seat which made for much more fab work. The Rhino
turbo is setting beside an H1C, which is a stock turbo for cummins 5.9
from '89-'93.

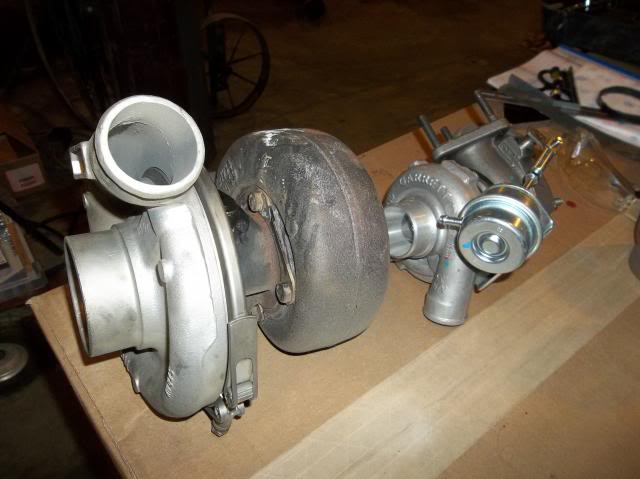
She's just a little feller. Garrett says she's good for 120HP. We are
hoping to make 55-60HP and keep it together for a long time.
Good time for a side note: Beware!!!!!!!!!!!! The Garrett GT1241
turbocharger is a bastard of sorts. It is not large enough for the
aftermarket performance world so, the inlet and outlet gaskets are not
readily available from these companies. I ultimately contacted
buyautoparts, where I bought the turbo, and told 'em I was sending the
turbo back due to lack of gaskets. They amazingly found the gaskets in
about 30 minutes. I now have en-route, five sets of inlet/outlet
gaskets for the Garrett GT1241 turbo. I am of the impression, if a days
worth of googleing and calling around doesn't yield results, they
don't exist.
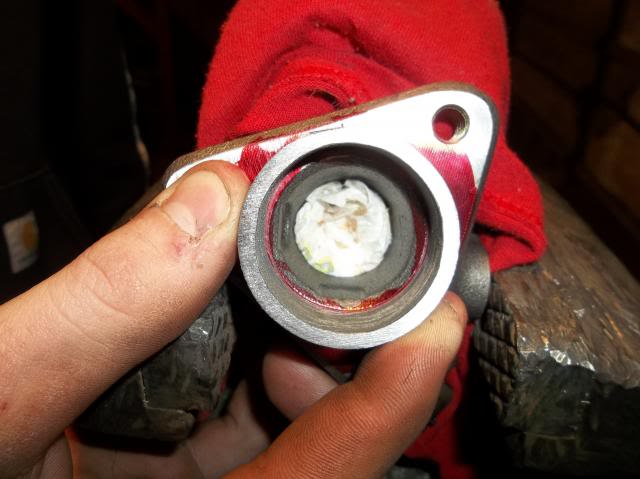
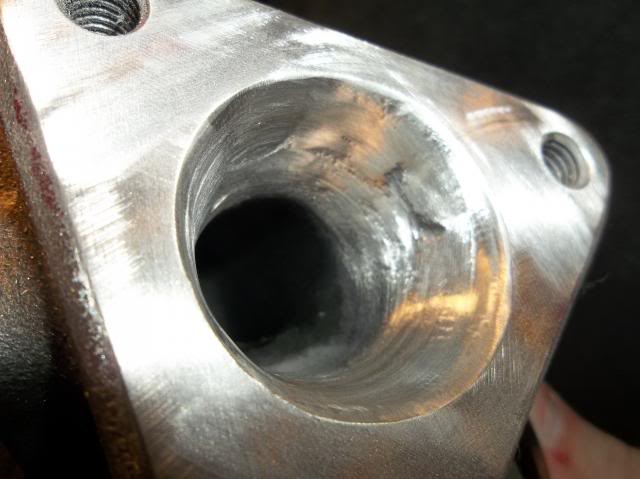
A little porting on the new turbo:

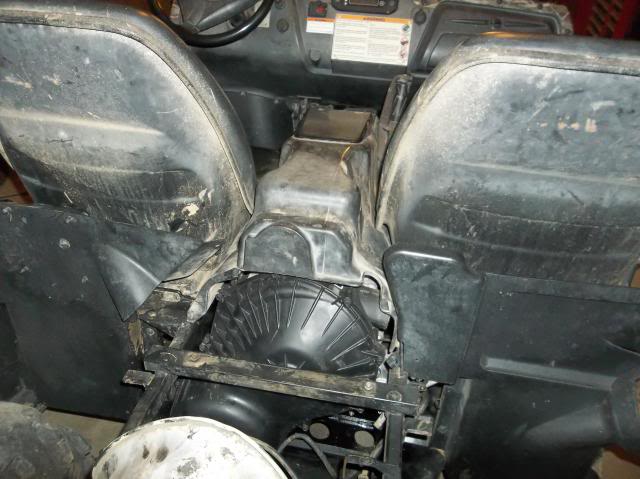
Now on to header fab. The poor little starter is going to take the
brunt of the heat. I would also like to ask, this thing should have
some sort of air passing through the engine compartment to carry the
heat out. What do you all think about this? Do you think enough air
will be passed set up with the stock Rhino plastic or should I devise
some way of routing more air to engine compartment?
These are 1" weld ells and a 1" nipple and 1-1/4" nipple. I bought
these planning to mount the turbo behind the head and hanging the turbo
from the header. Now that the turbo has become a remote mount, I
should have ordered lighter material to fab the header. Oh well, it
ain't to heavy.

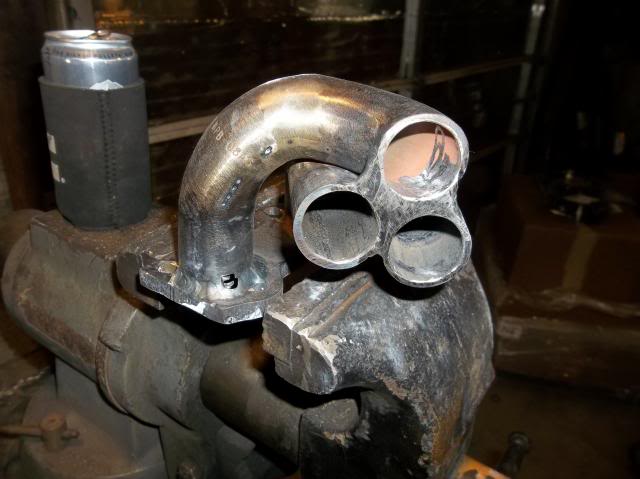


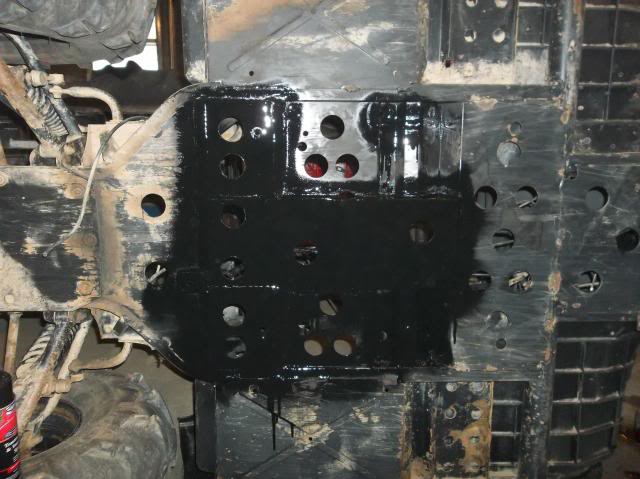
I did use pieces from the stock Rhino exhaust. I will be mounting the
turbo to the mid plate just beside the starter. That's all for now.